From Portable Boards to Permanent Glory
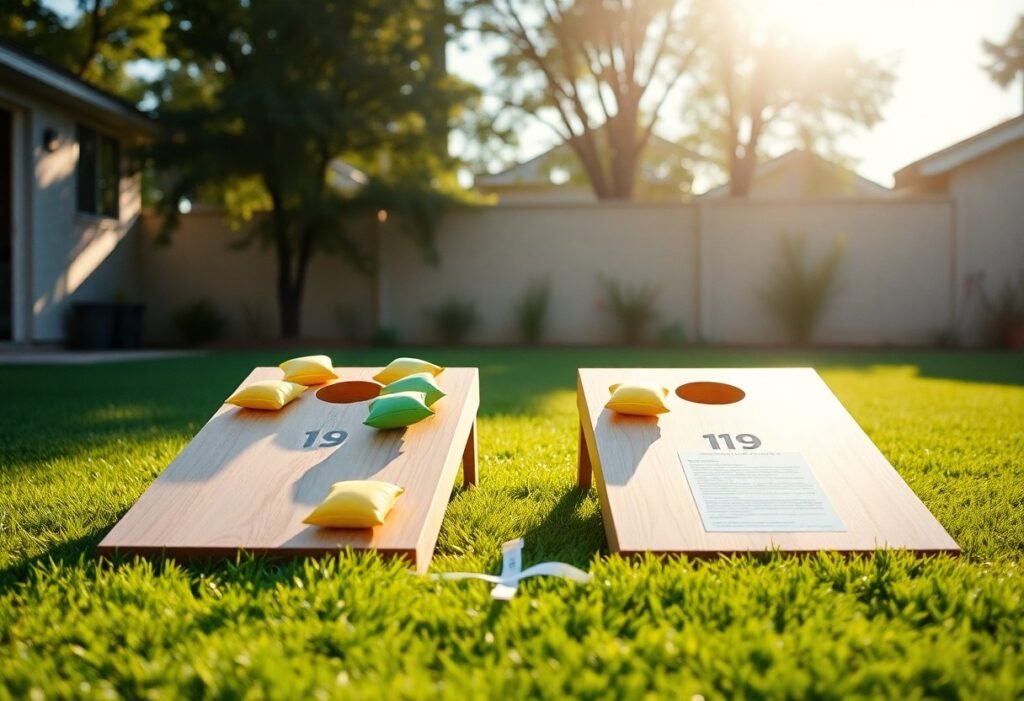
You love cornhole. You play every chance you get.
Your portable boards travel to tailgates, picnics, and friend’s houses. They serve you well.
But imagine something better.
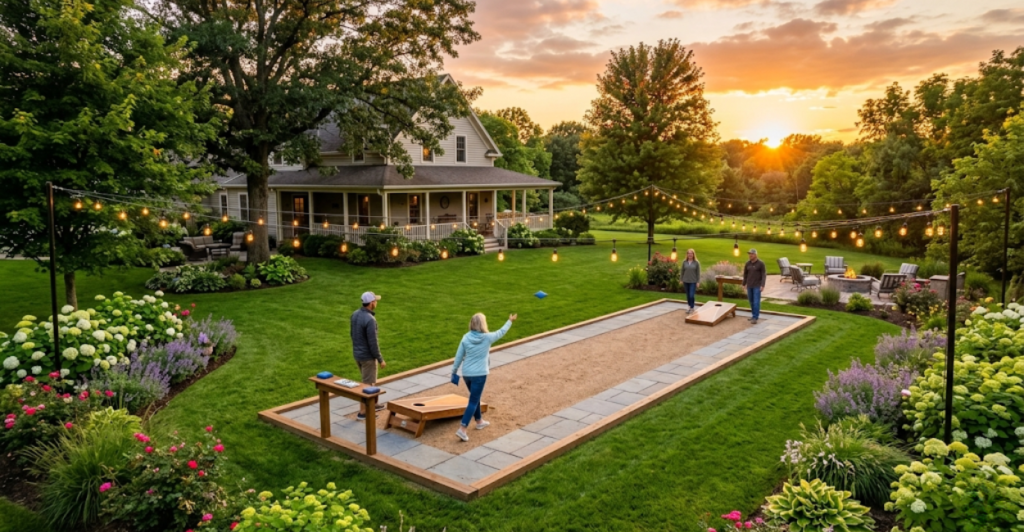
Imagine stepping into your backyard and finding a dedicated cornhole court. Boards always set up at the perfect regulation distance. Lighting ready for evening games. No dragging equipment from the garage. No measuring distances every time.
This guide walks you through building that dream.
You will learn official dimensions, surface options, lighting solutions, and budget considerations. Whether you want a simple grass court or a professional turf installation, these instructions work.
Let us transform your backyard into the neighborhood’s favorite gathering spot.
Why Build a Permanent Cornhole Court?
Before spending money and effort, consider the benefits.
Convenience changes everything. Games start instantly. No setup time means you play more often. A quick after‑work game becomes realistic.
Consistency improves your game. Playing on the same surface with consistent board placement builds muscle memory. Your accuracy will improve faster.
Entertainment value increases. Your backyard becomes a destination. Friends want to visit. Neighbors stop by. Kids have a dedicated activity zone.
Property value gets a small boost. A well‑designed court adds landscaping value. Future buyers will appreciate the thoughtful outdoor space.
Tournament hosting becomes possible. With a permanent court, you can host official events. Invite local league players. Run weekend tournaments.
The effort pays off in countless games and memories.
Official Court Dimensions and Layout
Get the measurements right. Everything else depends on this foundation.
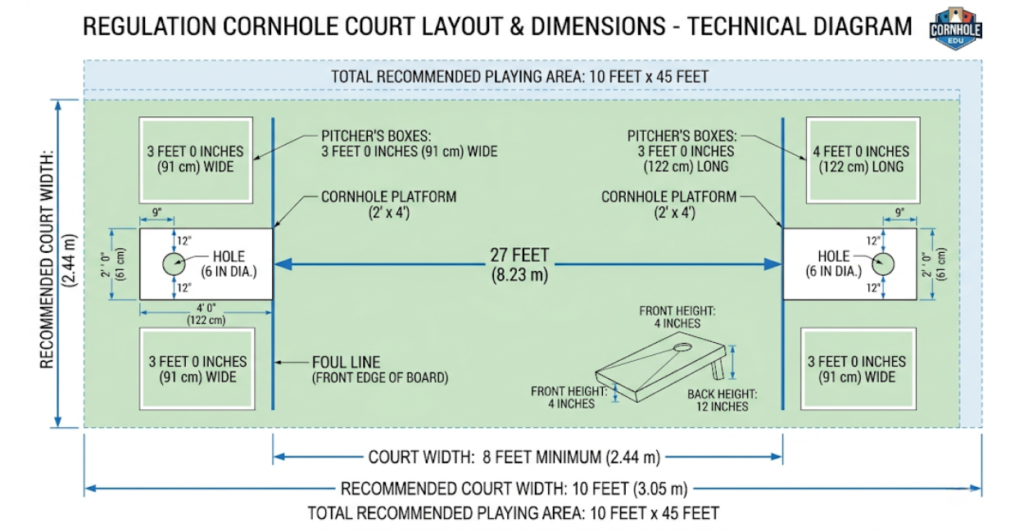
The 27‑Foot Rule
According to the American Cornhole Organization’s official history, the regulation distance between boards is 27 feet. This measurement goes from the front edge of one board to the front edge of the other board.
The same distance applies to the American Cornhole League. Both governing bodies agree on this standard.
Pitcher’s Box Dimensions
Each side of the court needs a pitcher’s box. This area marks where players must stand while throwing.
- Width: 4 feet
- Length: 3 feet (from the front edge of the board outward)
- Position: Centered with the board
Players must keep their feet behind the front edge of the board and inside the pitcher’s box during throws. Violations result in fouls.
Board Placement and Spacing
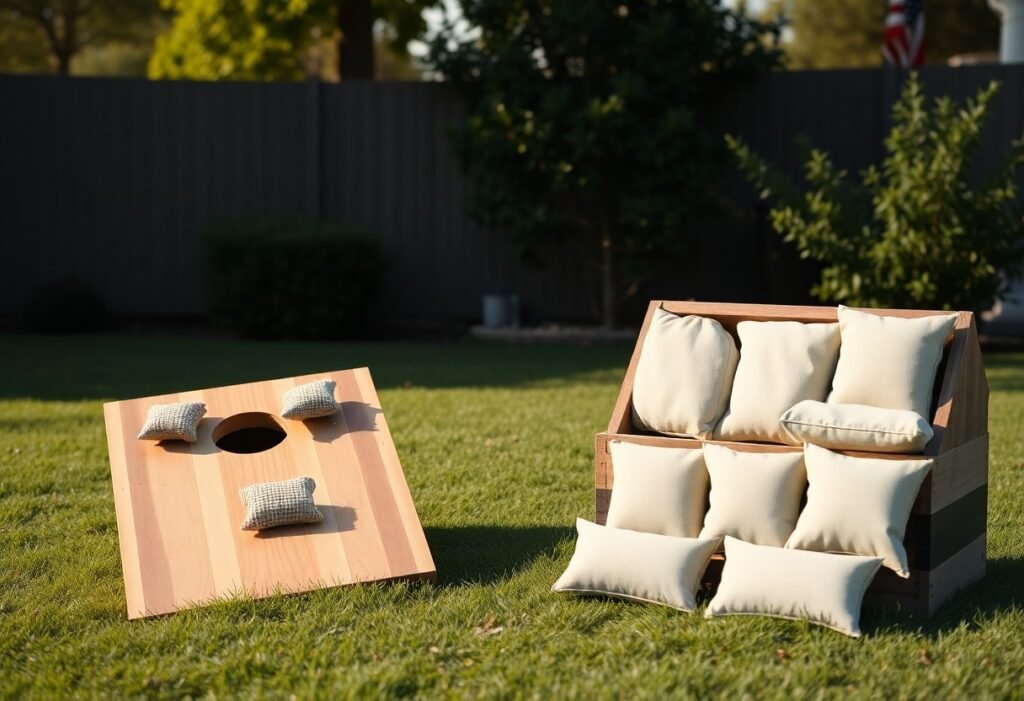
- Board dimensions: 2 feet wide by 4 feet long
- Board height: 12 inches at the back, 3‑4 inches at the front
- Hole diameter: 6 inches
- Hole center: 9 inches from the back and 12 inches from each side
Court Width Recommendations
The minimum court width is 8 feet. This gives players room to stand and throw comfortably.
The recommended width for serious play is 10 feet. Spectators can stand without interfering. Multiple games can happen side by side.
Foul Lines
Foul lines mark where players cannot cross. They sit 27 feet from the opposite board’s front edge. For younger players or casual games, a closer line (20‑24 feet) can be added.
Choosing the Perfect Location
Not every backyard spot works well. Consider these factors before digging.
Sun Orientation
Avoid positioning the court so players throw directly into the sun. East‑west orientation works best for afternoon play. Morning players should face west. Evening players should face east.
Ground Slope
The playing area needs to be level. A slight slope of 1‑2 inches over 30 feet is acceptable. More than that requires excavation or retaining walls.
Drainage
Water pooling destroys most court surfaces. Avoid low spots in your yard. If your chosen area collects water, plan for drainage solutions.
Accessibility
Leave room for players to walk around the court. Benches or seating areas should sit nearby. Consider wheelchair access if needed.
Distance from House
Place the court far enough from your house to avoid stray bags hitting windows. Thirty feet is usually safe. If space is tight, consider protective netting.
Tree Considerations
Trees provide nice shade but create problems. Falling branches damage surfaces. Roots disrupt ground leveling. Sap and leaves create mess. Clear trees at least 15 feet from the court edges.
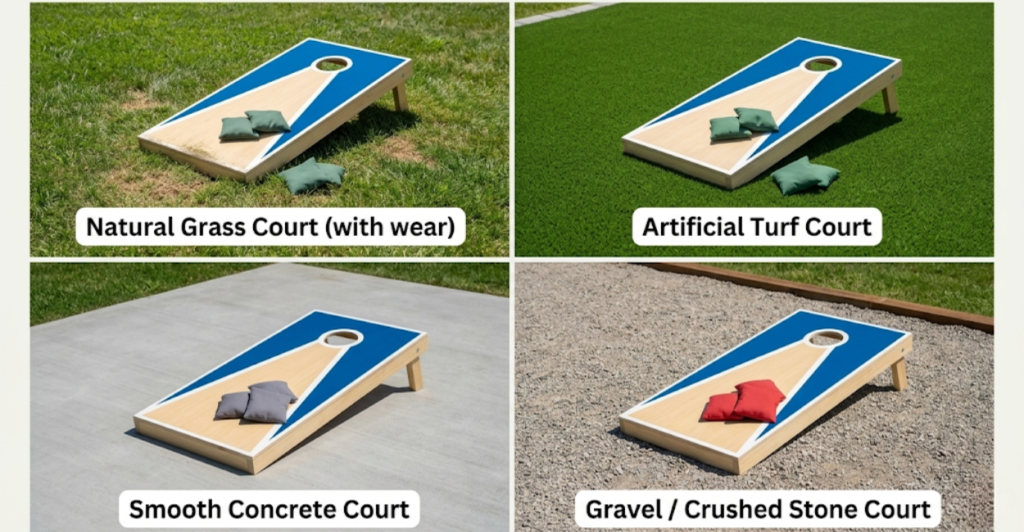
Playing Surface Options Compared
Your surface choice dramatically affects gameplay and maintenance costs.
Natural Grass
Grass courts feel classic and blend naturally with landscaping.
Pros:
- Lowest upfront cost ($0‑200 for grass seed)
- Natural appearance matches yard
- Soft landing for bags
- Easy to repair
Cons:
- High maintenance (mowing, watering, weeding)
- Becomes muddy when wet
- Wears unevenly in throwing areas
- Requires reseeding annually
Best for: Budget builds and casual players who already maintain a lawn
Artificial Turf
Turf has become the gold standard for permanent cornhole courts.
Pros:
- Consistent playing surface year‑round
- No mowing, watering, or fertilizing
- Drains quickly through backing
- Professional appearance
- Lasts 10‑15 years
Cons:
- Higher upfront cost ($800‑1500 for a typical court)
- Requires infill (sand or rubber crumbs)
- Gets hot in direct summer sun
- Professional installation recommended
Best for: Players who want low maintenance and tournament‑ready conditions
Concrete or Pavers
Hard surfaces offer extreme durability and weather resistance.
Pros:
- Impervious to rain (use brooms to dry)
- Never wears out
- Wheelchair accessible
- Easy to clean
Cons:
- Hard on bags (accelerates fabric wear)
- Bags bounce unpredictably
- Highest installation cost ($1500‑3000)
- Permanent alteration to yard
Best for: Wet climates and players who prioritize all‑weather access
Gravel or Crushed Stone
A budget alternative to paved surfaces.
Pros:
- Low cost ($100‑300)
- Excellent drainage
- DIY friendly
Cons:
- Uneven footing for players
- Stones scatter into playing area
- Bags get dirty quickly
- Not regulation friendly
Best for: Very casual play and extremely tight budgets
Surface Comparison Table
| Surface | Cost | Maintenance | Durability | Play Quality | Drainage | DIY Difficulty |
|---|---|---|---|---|---|---|
| Natural Grass | $ | High | Low | Medium | Medium | Easy |
| Artificial Turf | $$$ | Low | High | High | Excellent | Medium |
| Concrete | $$$$ | Very Low | Very High | Medium‑High | Poor | Hard |
| Gravel | $ | Medium | Medium | Low | Excellent | Easy |
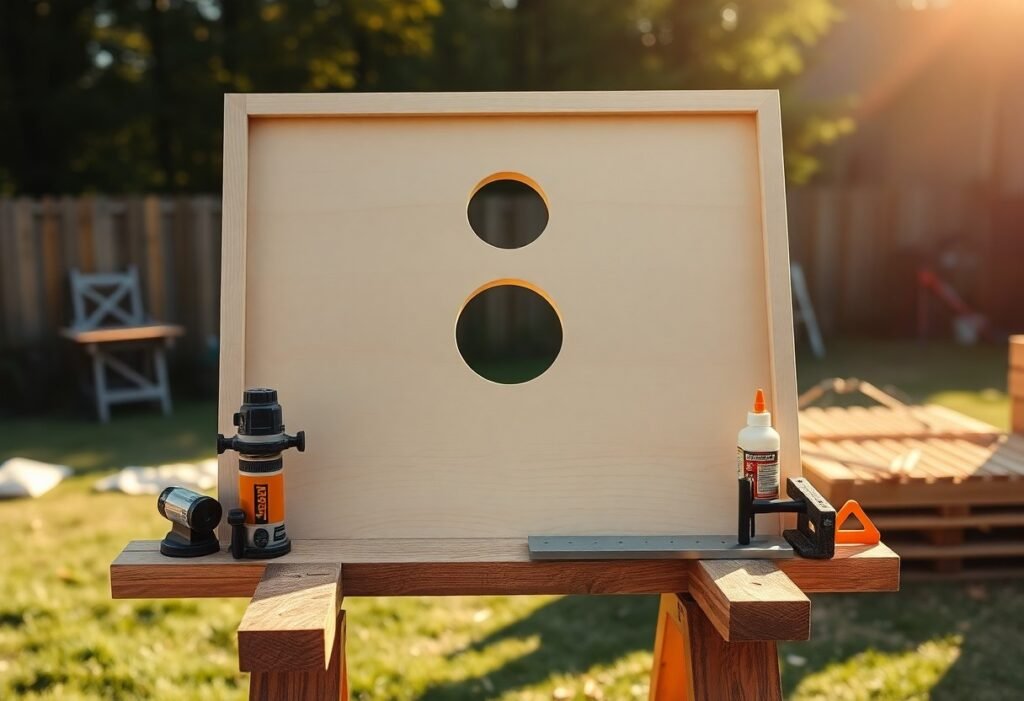
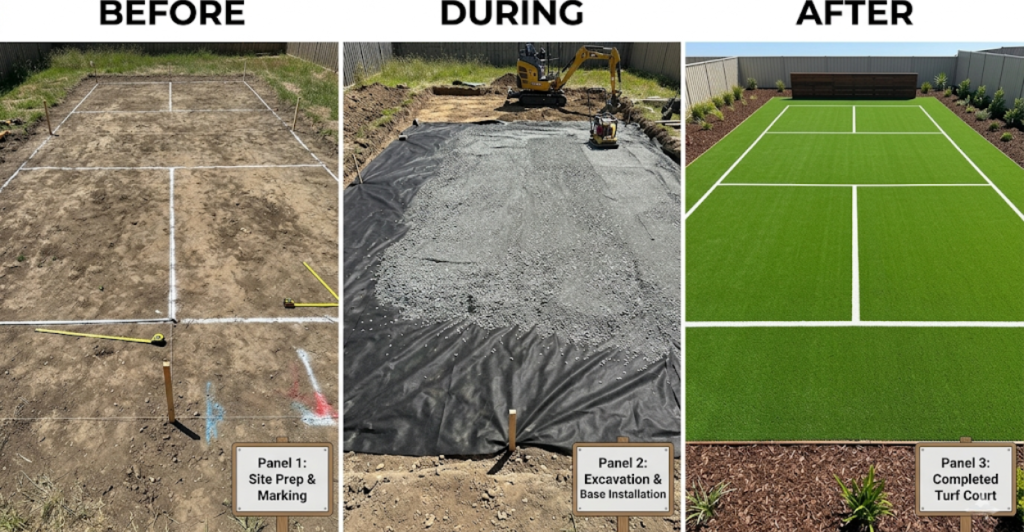
Step‑by‑Step: Building a Basic Court
This guide focuses on an artificial turf court. It offers the best balance of play quality and maintenance.
Materials You Will Need
- Artificial turf (minimum 8×30 feet, recommended 10×30 feet)
- Crushed stone or gravel base (2‑3 inches deep)
- Landscape fabric (weed barrier)
- Sand or rubber infill (for turf)
- 4×4 pressure‑treated timbers (for borders)
- Landscape staples or nails
- String line and stakes
- Level (4‑foot recommended)
- Shovel, rake, wheelbarrow
- Compactor or hand tamper
Marking the Layout
Start by marking your court boundaries. Use string lines and stakes.
Place stakes at the four corners of your planned court. The court should measure at least 8 feet wide by 30 feet long. Add an extra 2‑3 feet on each side for borders.
Confirm the 27‑foot distance between board positions. Mark where each board’s front edge will sit.
Preparing the Ground
Remove all grass, plants, and roots from the marked area. Dig down 3‑4 inches to create a base for the gravel and turf.
Check the ground for level. Adjust high spots by digging. Fill low spots with compacted soil.
Roll or tamp the exposed dirt until firm and smooth.
Installing the Base
Lay landscape fabric over the entire prepared area. This prevents weeds from growing through your court.
Add 2‑3 inches of crushed stone or gravel. Rake it evenly across the court.
Wet the gravel slightly. Compact it with a hand tamper or plate compactor. The surface should feel solid and drain quickly.
Installing the Borders
Set pressure‑treated 4×4 timbers around the court perimeter. They will hold the turf in place and create clean edges.
Secure timbers with 12‑inch landscape spikes. Ensure corners are square using a carpenter’s square.
Laying the Turf
Roll out the artificial turf across the prepared base. Allow extra material on all sides.
Let the turf relax for several hours. This allows wrinkles to settle.
Trim edges flush with the timber borders. Use a sharp utility knife with fresh blades.
Secure the turf with landscape staples every 12‑18 inches along the edges.
Adding Infill
Spread sand or rubber infill across the turf. Use a drop spreader for even distribution.
Brush the infill into the turf fibers using a power broom or stiff push broom. The infill should settle below the fiber tips.
Add approximately 1‑2 pounds of infill per square foot for typical cornhole turf.
Final Leveling
Check the entire court for low spots or high spots. Add or remove infill as needed.
Roll the court with a lawn roller to settle everything in place.
Installing Board Anchors (Optional)
Mark where your boards will sit. Install ground anchors or small concrete pads at these spots. This ensures boards stay exactly 27 feet apart even after heavy use.
Lighting Your Court for Night Play
Evening games become magical with proper lighting. Poor lighting frustrates players and ruins accuracy.
Solar Lamp Posts
Solar powered lamp posts offer easy installation with no wiring.
Pros: No electrical work, zero energy cost, automatic operation
Cons: Dimmer than wired lights, depends on sun exposure, shorter runtime in winter
Recommendation: Place one post on each side of the court, approximately 15‑20 feet from the boards. Choose models with at least 200 lumens per post.
String Lights
String lights add atmosphere but do not provide primary illumination.
Pros: Affordable, decorative, easy to install
Cons: Not bright enough for serious play, creates shadows
Recommendation: Use as accent lighting only. Combine with brighter sources for adequate visibility.
Flood Lights
LED flood lights offer the best illumination for night play.
Pros: Very bright, long lifespan, motion sensor options
Cons: Requires electrical wiring, higher upfront cost, may bother neighbors
Recommendation: Install two flood lights aimed at each board. Position lights 10‑12 feet high. Use 3000‑4000 lumen LEDs with warm color temperature (3000K).
Portable Battery Lights
Rechargeable work lights provide flexibility.
Pros: No installation, move anywhere, good brightness
Cons: Limited runtime (4‑8 hours), needs recharging, trip hazard
Recommendation: Good temporary solution for occasional night games. Upgrade to permanent lights if you play after dark regularly.
Lighting Placement Diagram
- Board lighting: Lights should shine from the sides, not behind or in front
- Avoid shadows: Position lights at 45‑degree angles to the boards
- Player lighting: Ensure pitcher’s boxes are well lit without blinding throwers
- Ambient lighting: Soft lights around the court perimeter improve safety

Drainage Solutions for Outdoor Courts
Water destroys cornhole courts. Plan for drainage before building.
For Turf Courts
Quality artificial turf has perforated backing. Water drains through the turf and into the gravel base below.
Your gravel base acts as a drainage layer. Ensure the ground underneath slopes slightly (1‑2 inches over 30 feet). Water will flow away from the court naturally.
Add a French drain around the court perimeter if your yard holds water. Dig a trench, add perforated pipe, and cover with gravel.
For Grass Courts
Grass courts drain naturally through soil. Compacted soil from foot traffic reduces drainage over time.
Aerate your grass court twice per year. This opens channels for water penetration.
Avoid playing immediately after heavy rain. You will damage the grass and create muddy footprints.
For Concrete Courts
Concrete does not drain. Water pools on the surface.
Slope your concrete court at 1/8 inch per foot toward one edge. Install a drain or channel at the low edge.
Use a push broom or squeegee to remove standing water after rain.
For Gravel Courts
Gravel courts drain excellently. Water passes straight through.
The challenge is keeping gravel in place. Install borders to contain the stones. Add fresh gravel annually as stones scatter.
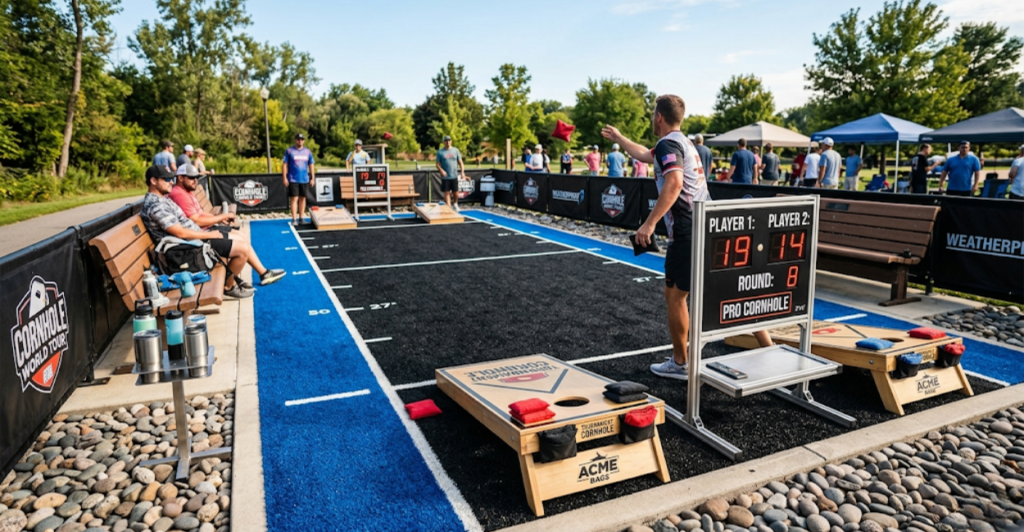
Accessories That Elevate Your Court
These additions transform a good court into a great one.
Scoring Towers
A digital scoreboard mounted beside the court eliminates confusion.
Features to look for: Wireless remote, large digits, weather resistance, battery or solar power
Price range: $100‑300
Our recommendation: Look for models specifically designed for cornhole. General sports scoreboards work but lack cornhole‑specific features like cancellation scoring.
Built‑in Bag Holders
Attach bag holders to your boards or to posts beside the court.
DIY option: PVC pipe cut to 6‑inch lengths, mounted to board sides
Commercial option: Powder‑coated metal brackets that clamp to boards
Price range: $15‑40 per holder
Player Benches
Seating on both sides of the court keeps games moving. Players sit while waiting for their turn.
Recommendation: Weather‑resistant benches with back support. Position benches 5‑10 feet behind the pitcher’s boxes.
Drink Holders
Cup holders mounted near throwing lines prevent spills on the court.
Options: Clip‑on cup holders for board edges, or permanent holders on posts
Price range: $5‑15 each
Windscreen
A fabric windscreen around the court perimeter reduces wind effects on bags.
Installation: Attach to fence posts or dedicated poles. Choose breathable mesh fabric that allows air through while blocking gusts.
Practice Target
A separate practice board off to the side keeps waiting players engaged.
Recommendation: A cheap secondary board or DIY plywood target
Landscaping
Flower beds, mulch borders, or river rocks around the court improve appearance.
Bonus: Landscaping defines the court boundaries visually. Players naturally stay within the playing area.
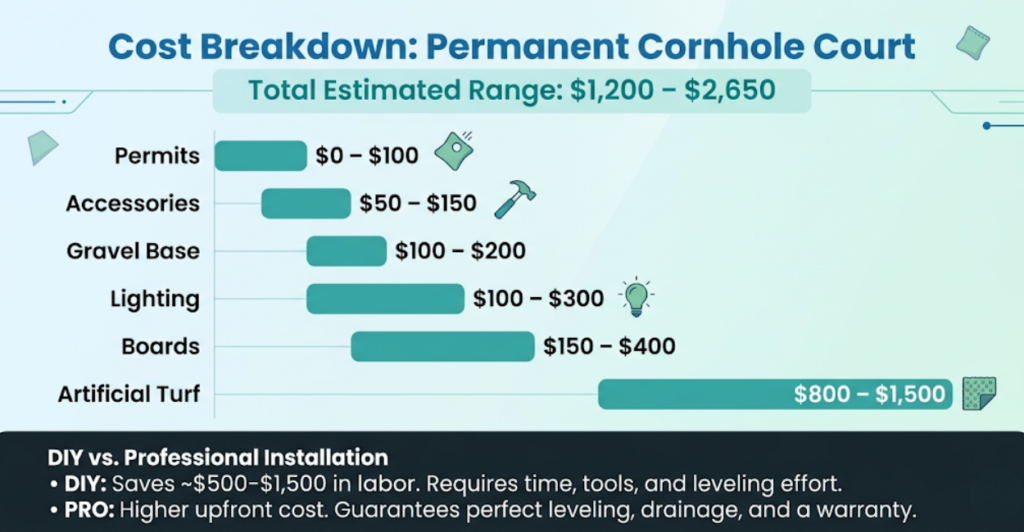
DIY vs Professional Installation
Decide whether to build yourself or hire help.
When to DIY
- You have basic landscaping skills
- You are building a grass or gravel court
- Your yard is already mostly level
- You enjoy weekend projects
- Your budget is tight
Time commitment: One weekend (2‑3 days)
Tools needed: Shovel, rake, level, hand tamper, utility knife
When to Hire a Professional
- You want an artificial turf court
- Your yard requires significant grading or excavation
- You want concrete installation
- You need electrical work for lighting
- You lack time or physical ability
Cost adder: $500‑1500 for professional installation
What professionals handle: Site grading, base preparation, turf seaming, drainage solutions, permit acquisition
Finding a Contractor
Search for landscape contractors who specialize in putting greens or bocce courts. These skills transfer directly to cornhole courts.
Ask for photos of previous similar projects. Request references from cornhole court customers specifically.
Get at least three quotes before choosing.
Budget Breakdown: What Will You Spend?
Costs vary dramatically based on your choices. Here is a realistic range.
Basic Grass Court (DIY)
| Item | Cost |
|---|---|
| Grass seed or sod | $50‑150 |
| String line and stakes | $15 |
| Leveling soil (if needed) | $0‑50 |
| Boards (one set) | $100‑200 |
| Total | $165‑415 |
Artificial Turf Court (DIY)
| Item | Cost |
|---|---|
| Artificial turf (10×30 feet) | $600‑1000 |
| Crushed stone base | $100‑200 |
| Landscape fabric | $30‑50 |
| 4×4 timbers | $50‑100 |
| Infill (sand/rubber) | $50‑100 |
| Boards (one set) | $100‑200 |
| Total | $930‑1650 |
Artificial Turf Court (Professional)
| Item | Cost |
|---|---|
| All DIY materials | $930‑1650 |
| Professional installation | $500‑1000 |
| Total | $1430‑2650 |
Premium Court with Lighting and Accessories
| Item | Cost |
|---|---|
| Turf court (pro installed) | $1430‑2650 |
| Flood lighting (installed) | $200‑500 |
| Scoring tower | $100‑300 |
| Benches and bag holders | $100‑200 |
| Windscreen | $50‑150 |
| Landscaping | $100‑300 |
| Total | $1980‑4100 |
Maintenance Tips for Long Life
Your court will last for years with proper care.
Turf Court Maintenance
- Weekly: Brush or rake the turf to keep fibers upright
- Monthly: Check for loose edges or staples
- Seasonally: Add fresh infill as needed (1‑2 pounds per square foot)
- As needed: Remove leaves and debris with leaf blower
- Never: Use metal rakes or power brushes on turf
Grass Court Maintenance
- Weekly: Mow at 2‑3 inches height
- Weekly: Water deeply (1 inch per week)
- Monthly: Fertilize during growing season
- Monthly: Spot treat weeds
- Annually: Aerate and overseed
Concrete Court Maintenance
- Monthly: Sweep clean
- As needed: Pressure wash to remove stains
- Every 2‑3 years: Seal with concrete sealer
Board Maintenance
- Store indoors when not in use (extreme temperatures warp wood)
- Clean with damp cloth – never soak boards
- Reapply polyurethane every 1‑2 years for outdoor boards
- Check leg locks regularly for loosening
Common Mistakes to Avoid
Learn from others who built before you.
Mistake #1: Incorrect Distance
The most common error. People measure from back edge to back edge or guess the distance.
Solution: Measure from front edge to front edge. Use a tape measure every time. Mark the exact board positions with permanent ground markers.
Mistake #2: Poor Drainage
Building in a low spot creates a muddy unusable court after rain.
Solution: Observe your yard during heavy rain. Note where water pools. Choose a different location or install drainage before building.
Mistake #3: Wrong Surface Choice
Grass sounds nice but becomes mud. Concrete looks clean but damages bags.
Solution: Match surface to your playing frequency and climate. Artificial turf works for most dedicated players. Grass only works for occasional games in dry climates.
Mistake #4: Ignoring Sun Position
Players throwing directly into the sun cannot see the hole.
Solution: Walk your yard at the times you typically play. Note sun angles. Orient the court east‑west for afternoon play.
Mistake #5: Skimping on Width
An 8‑foot wide court feels cramped. Players bump into each other.
Solution: Build 10 feet wide minimum. Add 2‑3 feet on each side for spectators.
Mistake #6: Forgetting Permits
Some municipalities require permits for permanent structures.
Solution: Check local building codes before digging. Call your city planning department. Permits cost little compared to fines or forced removal.
Frequently Asked Questions (FAQ)
How much space do I need for a cornhole court?
Minimum dimensions: 8 feet wide by 30 feet long. Recommended dimensions: 10 feet wide by 35‑40 feet long. Add extra space around the court for seating and walking.
Can I build a cornhole court on a slope?
Yes, but you must level the playing area. Terracing or retaining walls can create a flat section on a sloped yard. Professional help is recommended for significant slopes.
What is the best surface for a permanent cornhole court?
Artificial turf offers the best combination of play quality, low maintenance, and durability. Concrete works well in wet climates but damages bags over time.
How long does artificial turf last outdoors?
Quality artificial turf lasts 10‑15 years with proper maintenance. UV protection prevents fading. Infill may need refreshing every 2‑3 years.
Do I need a permit to build a cornhole court?
Permit requirements vary by location. Permanent structures often require permits. Temporary courts (movable boards on grass) typically do not. Check with your local building department.
Can I use my cornhole court in winter?
Yes, but remove snow before playing. Frozen bags can damage boards. Artificial turf becomes slippery when icy. Consider indoor winter play if you live in freezing climates.
How do I keep animals off my court?
Motion‑activated sprinklers or ultrasonic repellers work well. Fencing around the court perimeter offers permanent protection. Avoid leaving food or drinks on the court overnight.
Final Thoughts: Your Backyard Destination
Building a cornhole court takes effort. The rewards justify every shovel of dirt.
Your backyard becomes more than a yard. It becomes a gathering place. Friends will text asking when they can come over. Neighbors will stop by for “just one game” that turns into five.
Children will learn the game. Grandparents will still compete. Teenagers will actually leave their phones alone for a few hours.
Start simple if you need to. A grass court with regulation boards still brings joy.
Upgrade over time. Add lighting for night games. Install turf when the grass wears out. Build a scoring tower for your birthday.
The perfect court is the one you actually use. So start measuring. Start digging. Start building.
Then invite me over for a game. I will bring my own bags.
Sources & References
Official League Sources:
- American Cornhole Organization Official History – Regulation dimensions, 27‑foot distance, court specifications
- American Cornhole League Official Homepage – League rules, board dimensions, tournament standards
Building & Materials References:
- Artificial Turf Supply: Cornhole Court Installation Guide – Base preparation, turf selection, infill recommendations
- Family Handyman: Backyard Games Court – DIY construction techniques, tool lists, material estimates
Lighting & Electrical:
- Energy.gov: Outdoor Lighting Guide – LED recommendations, solar options, placement guidelines
Last updated: April 16, 2026
Author: TheaterOfSports Team